Showing posts with label RoombyRoom. Show all posts

Monday, November 24, 2014

Decorating the Entry Staircase

All kinds of decisions must be made for each entry we encounter. Individual style, budget, and emphasis all come into play.


With this entry the tree took center stage. The garland needed to be lush green and lit to be seen from the front drive and the emphasis was only placed on the newel posts. Ribbons often play a central role in decorating focal points of stairway garlands. This one started with wired ribbon and poinsettia picks and leaves were added to compliment the tree nearby. Careful attention is always paid in attaching garlands so woodwork is not scratched.


Ribbon is not always necessary to complete a garland for staircases.  Enough picks and ornaments placed in perfect points offer just the right amount of top dressing.


We have created fresh elements to add to existing artificial greenery garlands for this client. The wired stems of the garland are used as a way to pinch in fresh pepper berry, seeded eucalyptus, and magnolia leaves; a great way to bring fabulous holiday aroma to the whole house. These elements dry naturally and are removed after the season is over.


Friday, November 21, 2014

Creating a Christmas Mantle

Mantles present many challenges but there are many different solutions to achieve a well designed mantel to fit your style.


We took the art from this mantle  and replaced it with a natural wreath with matching topiaries to compliment and flank a coordinating garland. A few gold gilded magnolia leaves added to natural pine, stems, cones and berries adds just enough sparkle to this hearth room fireplace. Gold urns for the topiaries speak to the leaves and give a festive holiday feeling.


You don't have to remove art above the fireplace to add holiday trim, instead we framed this art with simple berry topiaries in clean white urns; just enough to get our client in the holiday spirit without hassle. Using her lidded vessels already in holiday color helps unify the look.


Another example of leaving art above the fireplace is this religious piece that speaks volumes to the Christmas holiday, underscoring it with a greenery garland and adding colors to compliment the art as well as the room in picks and ornaments. We dangled some lightweight ornaments off the edge to create more depth and movement, which provided more interest to a mantle design.

Monday, November 17, 2014

4 Simple Steps to Decorating a Designer Christmas Tree

Decorate a designer Christmas tree this year by following these simple steps:


1. Light Like a Pro
Our rule of thumb for the amount of lights that should go on a tree is 100 bulbs per foot. It may take more for a fuller tree, especially if few ornaments are going on it. Place your lights at alternating depth from the center to the branch tips. This will make it sparkle with brilliance! Remember to spread the load of the fuses on the strands according to instructions and don't plug more than recommended end to end as it will blow the fuses. Natural trees like the one shown above require plenty of lights but few ornaments. 

2. Collaborate What You Have 
Trees that have a lot of collected sentimental ornaments need not look jumbled. We make them unified and pulled together by using the same ribbon treatment throughout the tree and/or by using the same color pics or stems. Sometimes buying larger ornaments and spreading them throughout the tree as a base will work too. After these elements are in place, your sentimental collections will stand out but feel pulled together and purposeful. 

3. Adorn the Boughs to Scale
Make sure to buy enough ornaments to correspond with the size of your tree (about 15 for a 9' tree) and the size of your room. We recommend buying several large ornaments, some medium, and finishing with smaller ones. Larger ornaments should be tucked deep inside the tree and smaller ornaments on the tips of the branches, this way we create lots of depth and texture, which make for a more interesting design. 

4. Finish With Flare 
To finish the tree with a designer look, we add height by using tall stems of glittered branches or grasses and leaf picks. This makes a fountain-like burst at the top of the tree and adds a bit more drama than an angel or star perched on top.                                                           


Monday, November 10, 2014

Quick Kitchen Sink Solution


Kitchen sinks present the opportunity to add some softness to a corner, as long as it can be easily cleaned. A little foliage next to a complimentary accent ties the look together. This project requires little effort and maintenance, but gives warmth to the metallic tone of the sink. 

Monday, October 27, 2014

Filling a Blank Wall


Our client bought a table and let us finish the wall in her newly built home. We added a well scaled mirror and a contemporary bowl filled with moss orb accents. Then, we balanced the look further by bringing in two classic lamps. The finished look made the lower level feel inviting and complete. This solution is an outstanding option for a short blank wall that creates a corner or  at the end of a hallway.

Tuesday, October 7, 2014

Niches


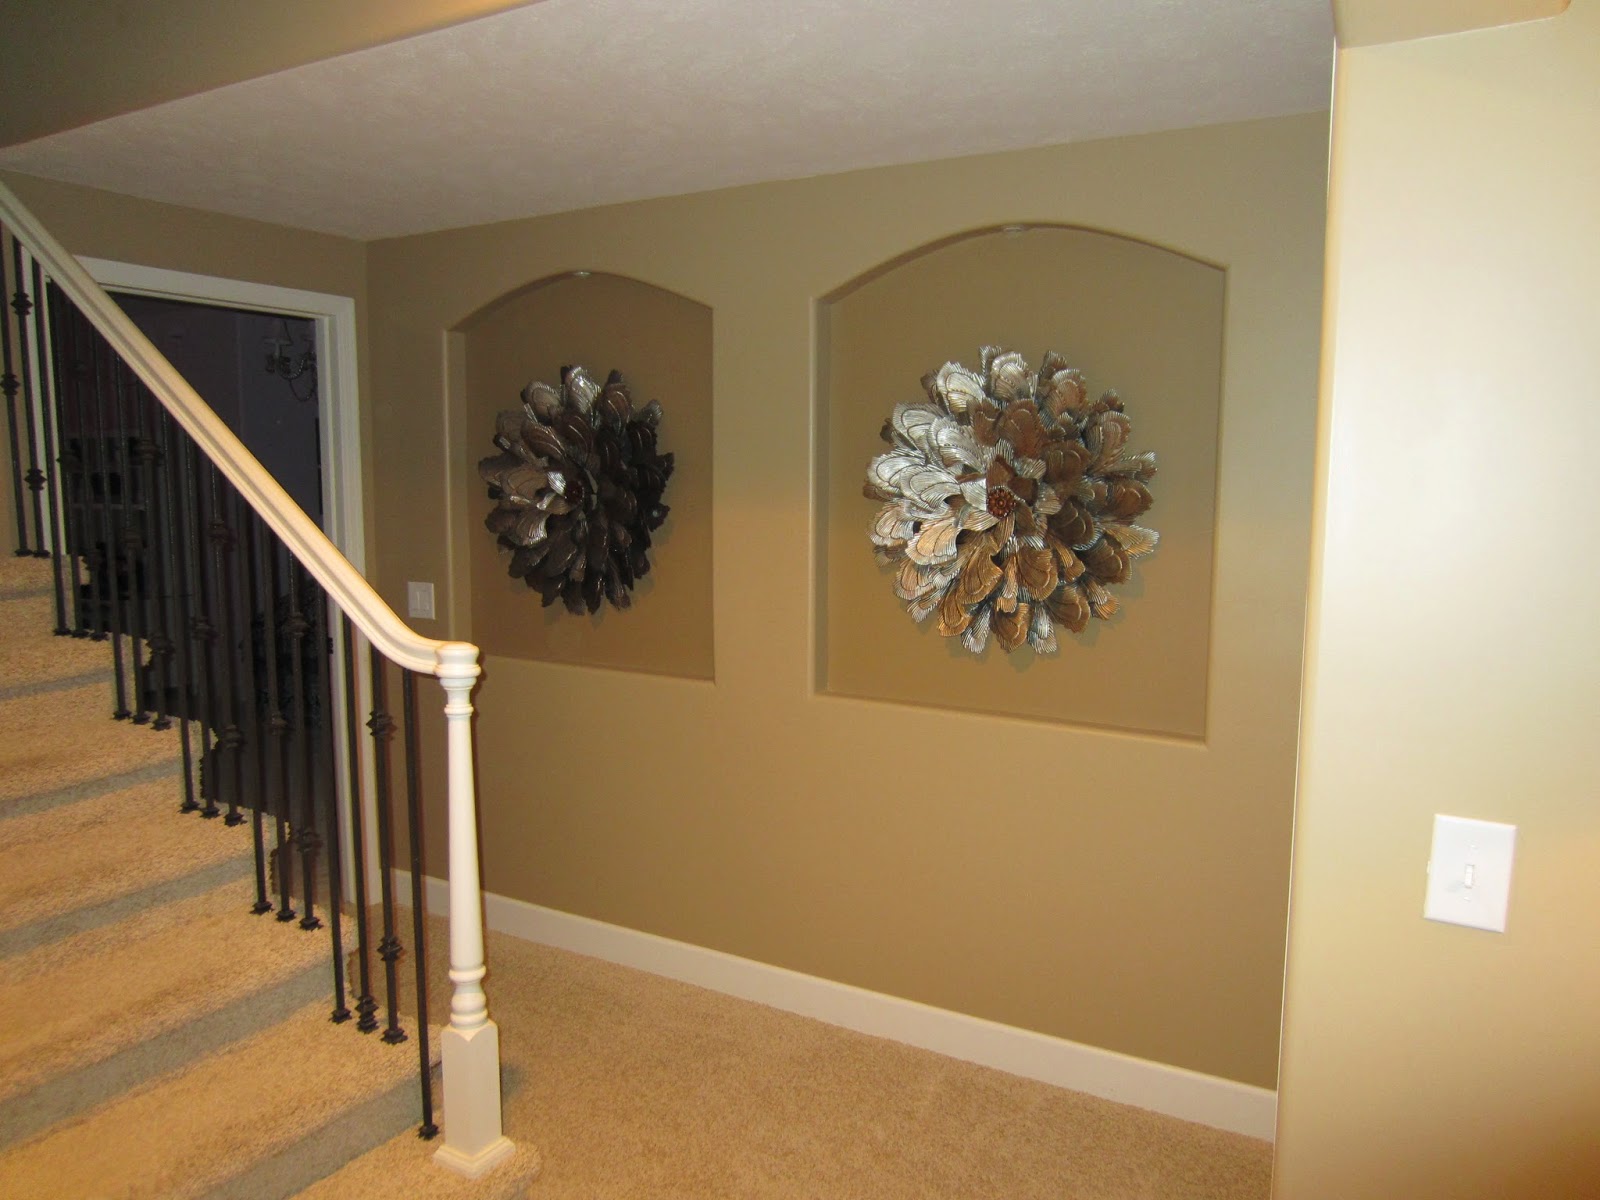
Builders seem to love putting niches in new houses. Each niche provides all kinds of decorating possibilities and we always enjoy finding new solutions for them. These two wrought metal wall flowers fill each space while standing out with distinction. They also create an artistic backdrop for the staircase.

Monday, October 6, 2014

Edit and Refresh


Sometimes it's not what you add to a room, but what you edit! This living room corner is the perfect example. We re-positioned this console table elsewhere in the home to add height to the space. Then, we brought a silver chest in from another room and placed an elegant glamour lamp alongside some silver accents. 


We brought in the chair to make the corner cozy, then traded the art to make the look complete and different. Editing is an easy, cost effective solution to creating an entirely new look  in your home. Get inspired with more pictures from our website!

Thursday, October 2, 2014

Creating a Lovely Living Space


Our homeowner knew a formal dining room wasn't needed for her family, a living room was better suited for their comforts. To create the space she wanted, we started with two custom blue chairs already existing in another room and pulled the red rug to reveal a "tile" rug.


Next, we brought a mirror topped coffee table to anchor the conversation area. One large piece of transitional blue art from our showroom brought sophistication. We retired the ficus tree and replaced it with an existing vase of bamboo to add the dramatic pause we needed. An unused dining room soon became a comfortable conversation space.

Monday, September 22, 2014

Create a Space for Conversation


When designing your living space, remember to give everyone and everything a place. Put chairs closer to each other for conversation and invite guests to set things down by placing a table next to or between them. We applied this idea to our client's home to create a relaxed space.


 A strategically placed red tray with soft foliage on the ottoman allowed a convenient spot for the remote. We then placed solid colored pillows that had different textures on the sectional to update the look without fighting with the patterned rug.

Casual family rooms function best with side tables for resting snacks, chairs within talking distance of each other, and designated spots for devices to create ease and comfort.


Monday, September 15, 2014

Welcome Them In


The decor in any home's entry presents the first impression of our sense of style.  A table with the right lamp is generally accepted as great ambiance. However, this table was relocated to a more appropriate scaled space, which made way for a new setting.


We brought a round table with iron legs to the entry space to speak to the iron details in the staircase and door trim. We then placed a much larger lamp and positioned the perfect red chair in front of larger scale art that we borrowed from another room. A beautiful silk orchid design was the perfect softener to the area and completed the inviting look.


We re purposed our client's entry table by putting it behind her sectional in the family room where it lent separation from the kitchen space. Our client's additional accessories topped the demi-lune table to add to the well lived room.

By introducing one or two new items and arranging pieces our client already had, we made a friendly, inviting place to welcome guests in.

Monday, December 16, 2013

Room by Room: Niches


The best way to fill a lighted niche is with properly scaled art and silks or sculpture.


Monday, December 9, 2013

Room by Room: Home Office


Every bookshelf needs a soft element as well as texture changes from rough to shiny. 


The main ingredients of shelf décor are color, texture, and scale. Simple larger items are easy on the eyes.


Monday, December 2, 2013

Room by Room: Kitchen Niches


Kitchen niches need décor with color and symmetry to make them seem ordered.

Monday, November 25, 2013

Room by Room: Coffee Table


Coffee tables need three big things to complete a story. Books are always a favorite of mine as at least one of the elements. 

Monday, November 18, 2013

Room by Room: Fireplace


Mantle candlesticks and vase designs can bring balance to an asymmetrical fireplace. A tray on the ottoman brings softness and function. 

Monday, November 11, 2013

Room by Room: Kitchen Table


Kitchen tables need interest that doesn't interfere with meals. This adds a finishing touch to the stone. 

Monday, November 4, 2013

Room by Room: Dining Room


Dining table décor makes a dining experience cozy and more familiar. High ceilings call for tall candlesticks and a pedestal arrangement. 

Monday, October 28, 2013

Room by Room: Powder Room


Silk botanicals can cozy any powder room and make it inviting for guests. 

Monday, October 21, 2013

Room by Room: Bedroom


Layering artwork behind lamps on a nightstand creates depth in the bedroom. Properly placed frames, pillows, and throws are the icing on the cake. 

Monday, October 14, 2013

Room by Room: Hearth


There is nothing better than a pair of great lamps and the perfect art and mirrors to elevate a room's status.